Design Notes
If you are curious why Decanter AI Core SDK does certain things the way it does and not differently, this section is for you.
Background
Decanter AI
Decanter AI is an AutoML tool, which is able to do feature engineering, auto model training and prediction.
Actions
There are 4 actions that are provided by Decanter AI.
Upload Data: User has to upload the data to Decanter AI that is used for training or predicting.
Setup Data: Change data column type
Train Data: Training models, based on the data upload previously.
Predict Data: Predicting the data with the model which is trained previously.
Design Decisions
When a developer is using Decanter’s API, such as using upload api to upload a csv file. He needs to start the upload by sending the upload request and monitor the status by continuously sending requests and receiving responses from getting task api. It’s not that convenient and it’ll block other processes while waiting for the task to be done, causing the decanter server to waste its resources, since it can process up to four tasks at a time.
In order to let the user handle tasks more efficiently and intuitively, there are three main goals:
The user needs not be aware of the existence of API.
The user needs not be aware of the task lifecycle.
Non-blocking when running tasks that don’t have a dependency relationship. (ex. Tasks of uploading train and test data don’t depend on each other, making them run concurrently and asynchronously saves more time.)
Design Overview
Context Module
Context module manages the global eventloop.
Client Module
Client module provides main function SDK users, including 4 actions. The user creates the actions with specified parameters, therefore, it will put the task into eventloop list which is managed by Context.
CoreAPI Module
CoreAPI module is a client of Decanter AI Server. Its responsibility is to communicate with Decanter AI server.
Job and Task Module
We mainly have four actions to do during training models:
Upload(Task) ⇒ DataUpload(Job)
Setup ⇒ DataUpload
Train ⇒ Experiment
Predict ⇒Predict Result
We structure the result we want to get as a Job which will store the properties we wish to get easily. We let every corresponding action be a Task which will be executed by a Job in order to get the result from it.
The relationship between Job
and Task
Each Job has a Task and the Job’s mission is to execute the Task and wait for it until it’s done.
Job’s properties (or attributes) is the result of the Task.
When every Job starts to execute and gets the result from Task, it needs to wait for all the Job in its jobs list to be done.
Ex. PredictResult <Job> must wait for Experiment <Job> and DataUpload <Job> to be done.
How to do it asynchronously?
Why do we need asynchronous functionality? Since the decanter server can actually handle upto 4 tasks running at once, if we do the job synchronously, we could only do one task at a time which is time-wasting.
We address this by using the Coroutines and Tasks in the Python asyncio library
We use await to handle the blocking problems. According to
this passage.
“When you call await, the function you’re in gets suspended while whatever
you asked to wait on happens, and then when it’s finished, the event loop will
wake the function up again and resume it from the await call, passing any
result out.”
Therefore, coroutines that involve time-consuming calls such as calling APIs
or waiting for pre-requests Job to be done will be blocked and idle, and this
is the condition we can call await. It’ll block the currently running
coroutines and put them onto the event loop’s list of paused coroutines so something
else can be run.
In Job there are two blocking conditions:
Waiting for undone pre-requests jobs: Call
await asyncio.sleep()to suspend the current running coroutine and resume after a few seconds. Means thatJob.wait()check the jobs status every five seconds.Calling API: When calling
self.update()the Task will fetch the result from Decanter AI server, we useawaitto wait for the result, so it can run other coroutines while waiting for the response.
Job.wait:
# pesudo code of the coroutine Job.wait()
async def wait(self):
    # check if all the jobs in list is done
    # if haven't call sleep to let other coroutine can be execute
    while not all self.jobs is done:
            await asyncio.sleep(5)

    # if there's jobs failed the coroutine fails to and no need to execute
    if not all self.jobs is success:
            return

    # start to execute task
    self.task.run()

    # keep update task result and Job properties by calling self.update
    # finshed when task is done
    while self.task.not_done():
        await self.update()
        await asyncio.sleep(5)

    # update the status of the Job
    # other jobs that waits for this can know that it's done
    self.status = self.task.status
Structure Flow Overview
When we create the client of CoreClient() client = CoreClient() we simply
create a Job. And its coroutines Job.wait() will be scheduled to
execute in the event loop.
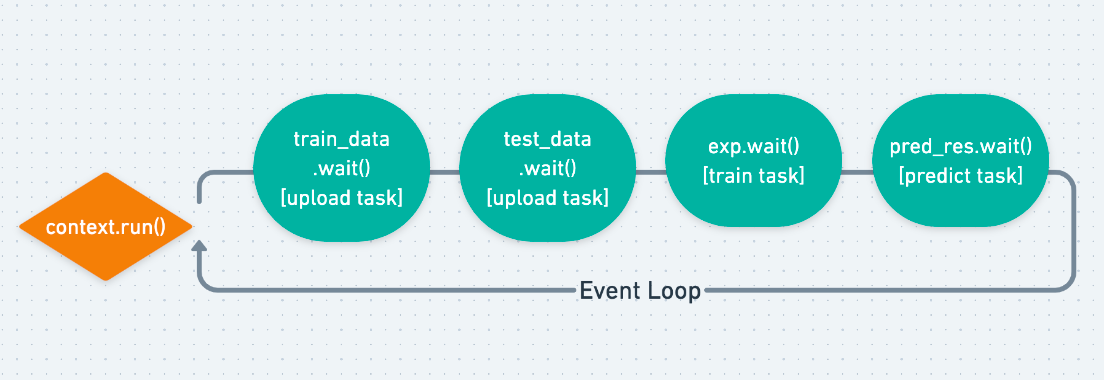
Notice that the event loop won’t start to run until we call
context.run() and each Job has its own Task waiting to be finished.
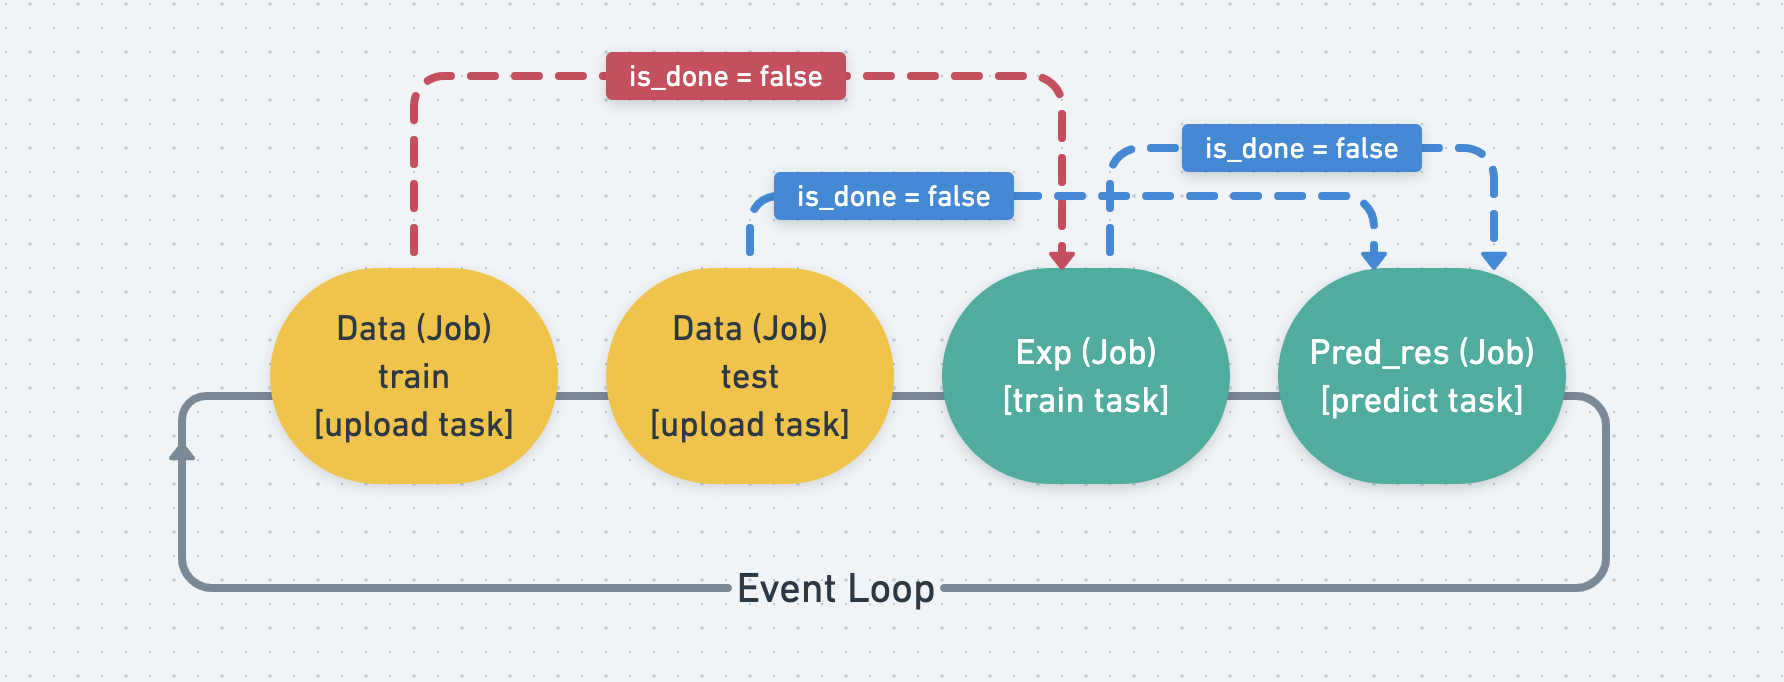
But each Job’s task has different timing to start, as shown by the picture below. Ex. exp needs to wait for train data to finish, and pred_res needs to wait for test data and exp.
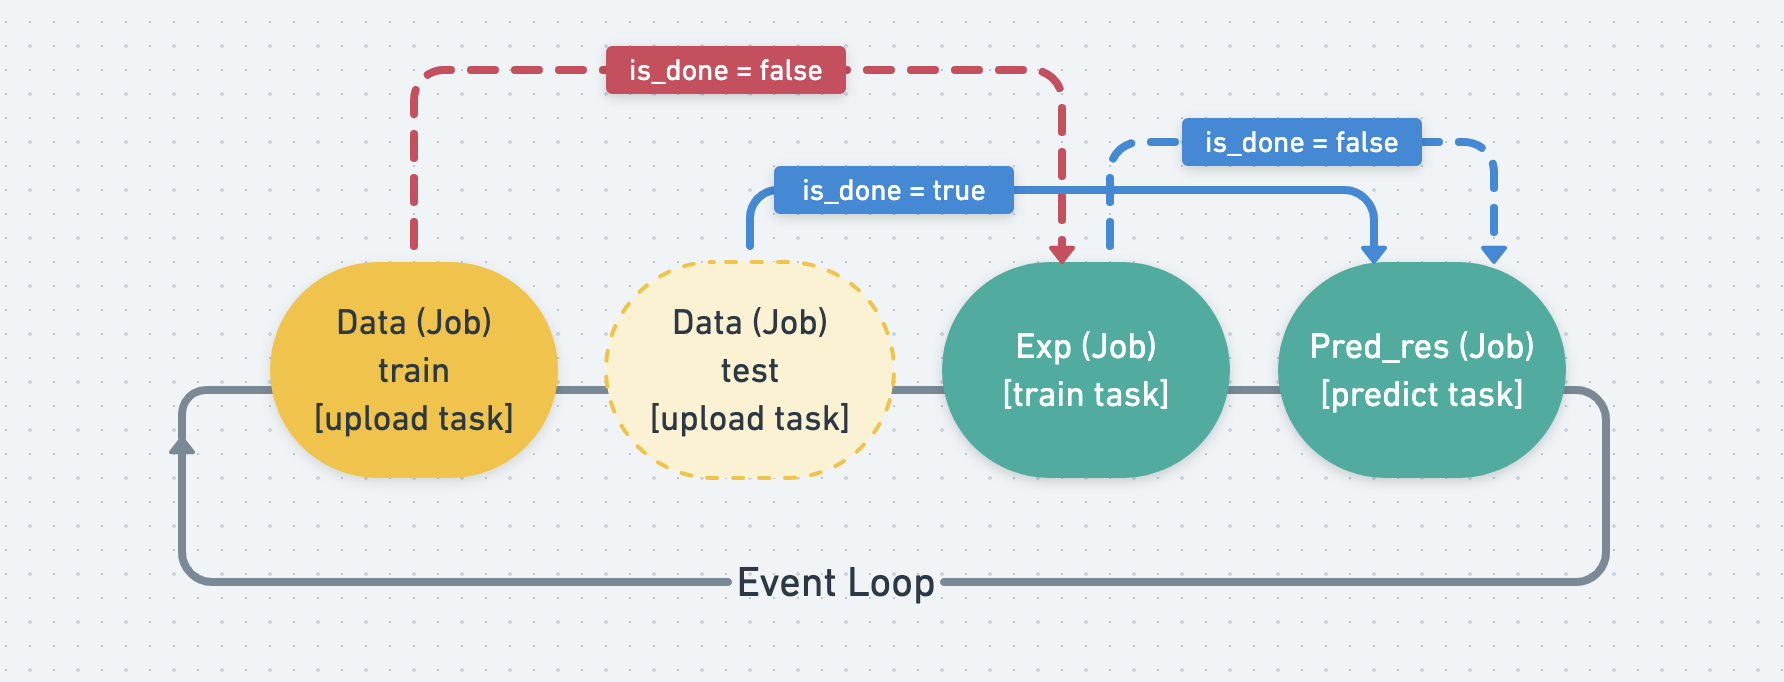
When a Job is finished, it will set its is_done tag to true, and
leave the event loop.
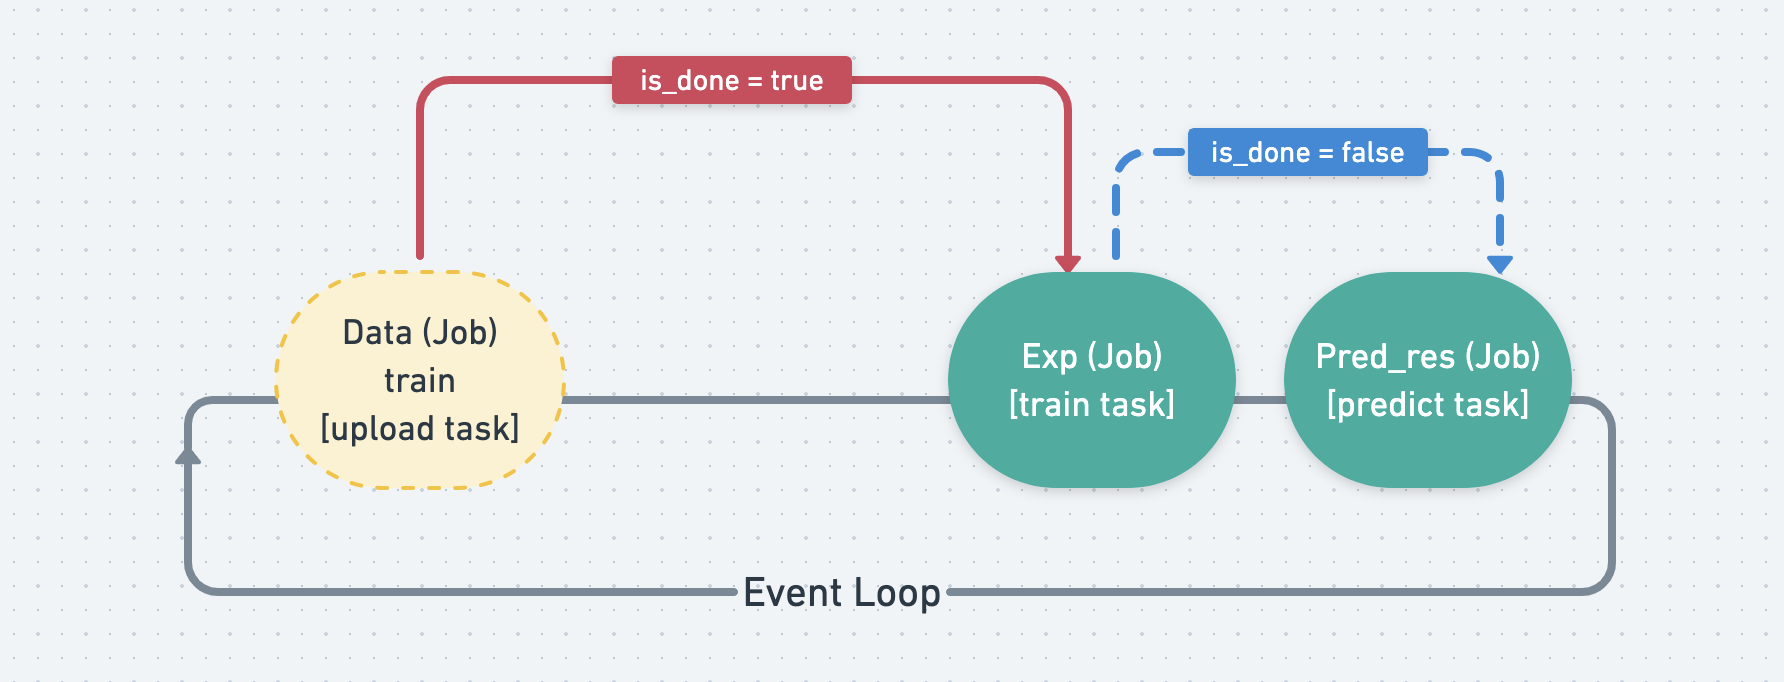
Since the Job that waits for other Job s will keep monitoring its is_done tag,
when it finds all of the Job s its waiting are done, it will start to run
its own Task.
